Help

Frequently Asked Questions

Here are answers to some common questions about installing, setting up, and using SafetySense.

I just downloaded SafetySense. What do I do next?

Follow the installation guide for four clear steps covering installation, camera setup, Demo or account mode, and testing. View installation guide ›

My camera is not being detected. What should I check?

Make sure your Windows PC and all cameras are on the same Wi-Fi network. Confirm you created a camera username and password in the Tapo app and used the same credentials for every camera. Restart SafetySense after making any changes.

Does SafetySense work on a laptop without a GPU?

Yes, for up to 4 cameras. Detection speed depends on your processor. A GPU handles more cameras more smoothly — see the hardware guide on the Get Started page.

Is the video from my cameras stored anywhere?

No. All video is processed locally on the Windows computer inside the home. Live footage is never uploaded to any server. Only alert notifications travel over the internet.

What happens after my free month?

You will receive a simple prompt asking if you want to continue. If yes, it is $25 a month. If not, no charges and no hassle.

Can I cancel my subscription?

Yes, any time with no cancellation fees. You keep full access through the end of the billing period you already paid for. After that your subscription ends and no further charges are made.

Still need help?

Email support@safetysense.ai and describe what you are seeing.

McAfee Help

Allow SafetySense through McAfee

If McAfee blocks or quarantines the SafetySense installer, follow these steps to restore the file, run the installer, and return McAfee protection to its normal state.

1

Review the McAfee warning

If McAfee reports that it blocked or quarantined the SafetySense installer, do not repeatedly download the file. Open McAfee so you can review what happened.
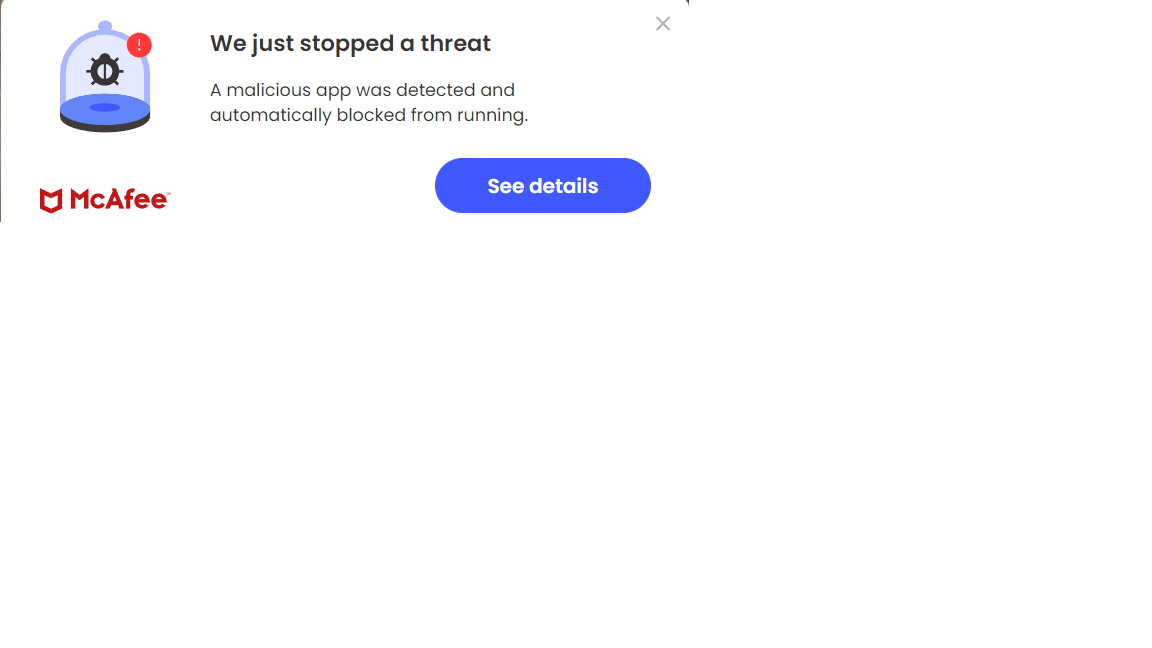
McAfee warning popup
Example McAfee warning.
2

Open McAfee

Open the McAfee application from the Windows notification area, Start menu, or the warning window.
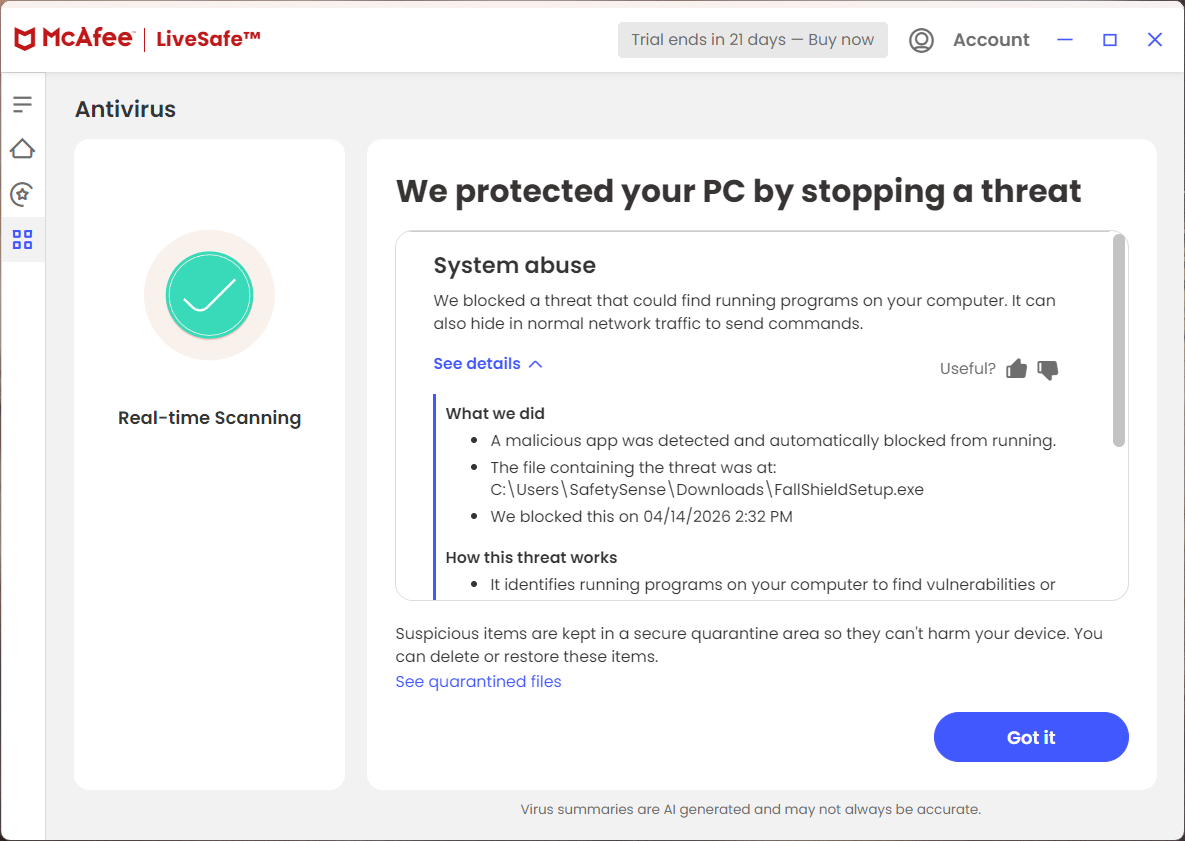
McAfee application window
Open the McAfee application.
3

Open Real-Time Scanning

Find Real-Time Scanning in McAfee settings. If McAfee continues to remove the installer immediately, you may need to temporarily turn this protection off while restoring and starting the installer.
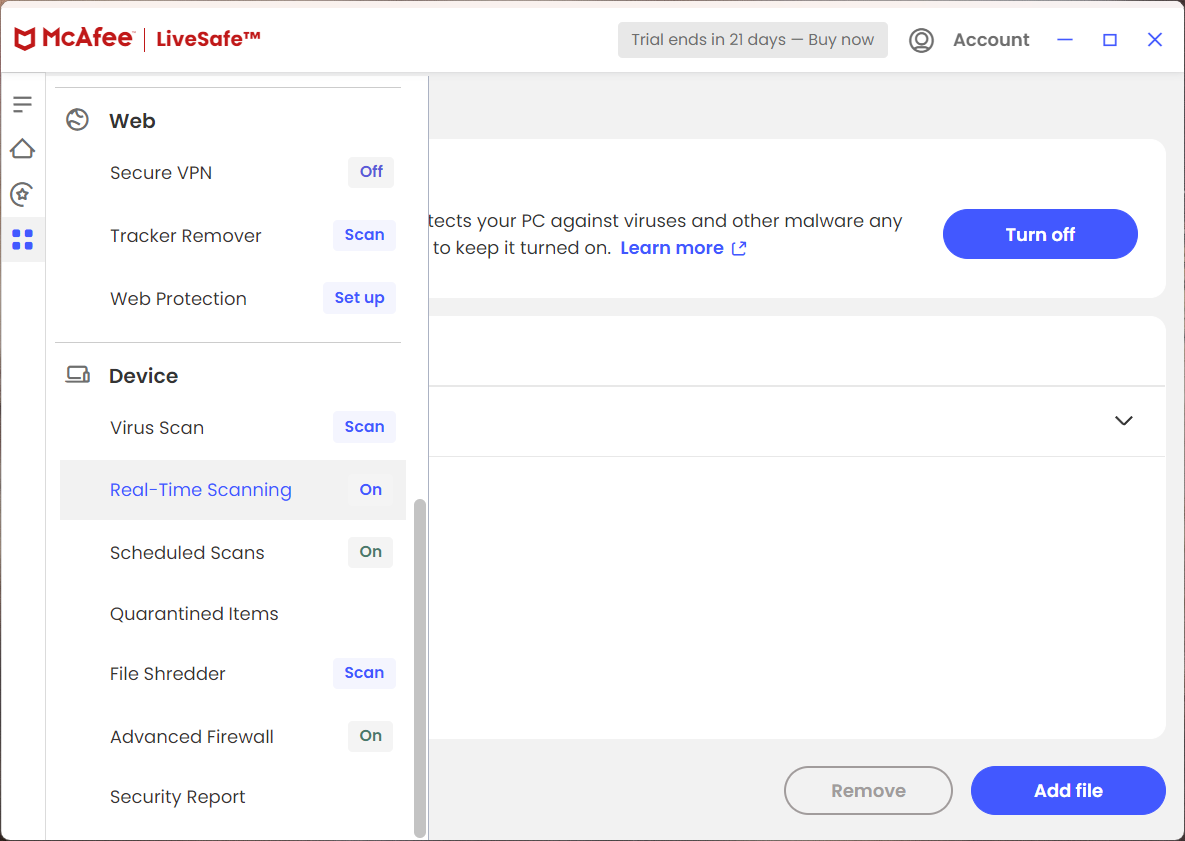
McAfee Real-Time Scanning settings
Real-Time Scanning settings.
4

Temporarily turn scanning off if necessary

Temporarily turn off Real-Time Scanning only if McAfee keeps blocking the SafetySense installer. Keep this period as short as possible.
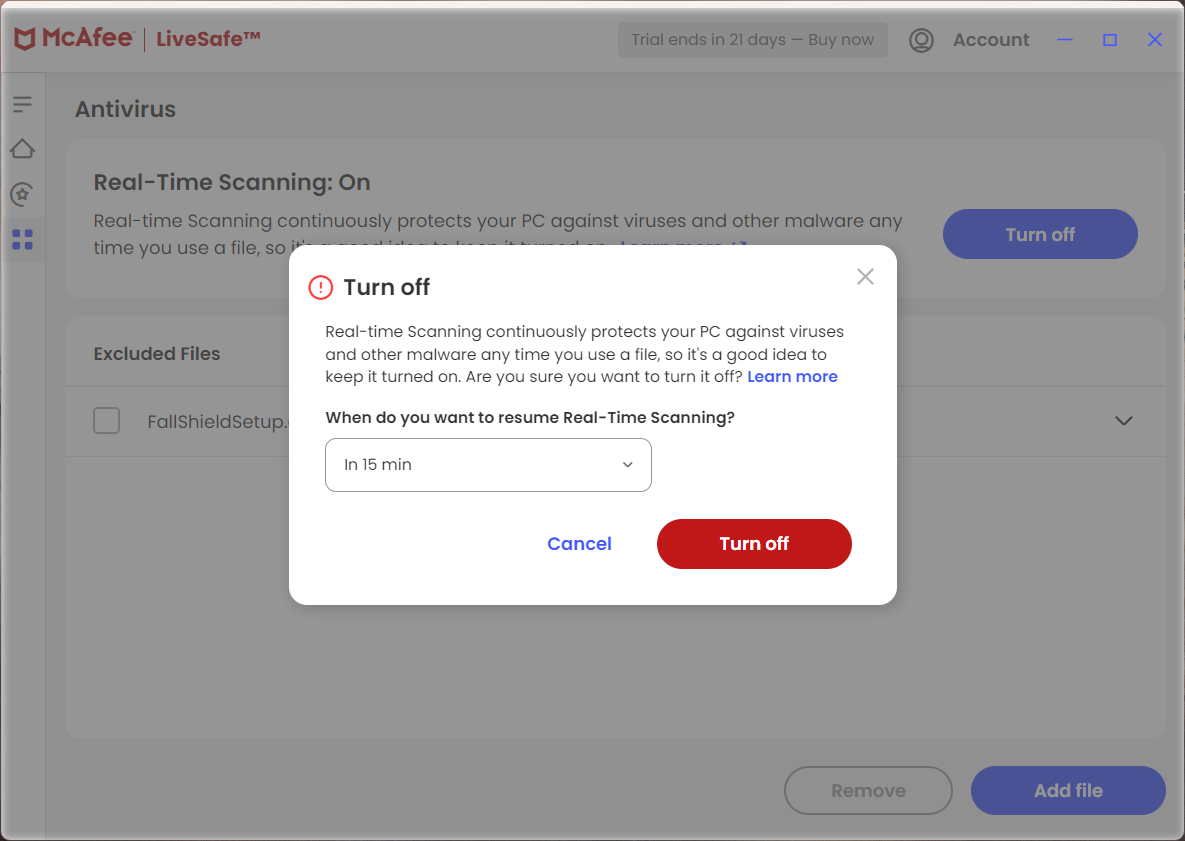
McAfee Real-Time Scanning turned off
Temporary Real-Time Scanning setting.
Important: Turn McAfee protection back on after the SafetySense installer has started or installation is complete.
5

Open Quarantined Items

Open McAfee's quarantined items or quarantine history and locate the SafetySense installer that was removed.
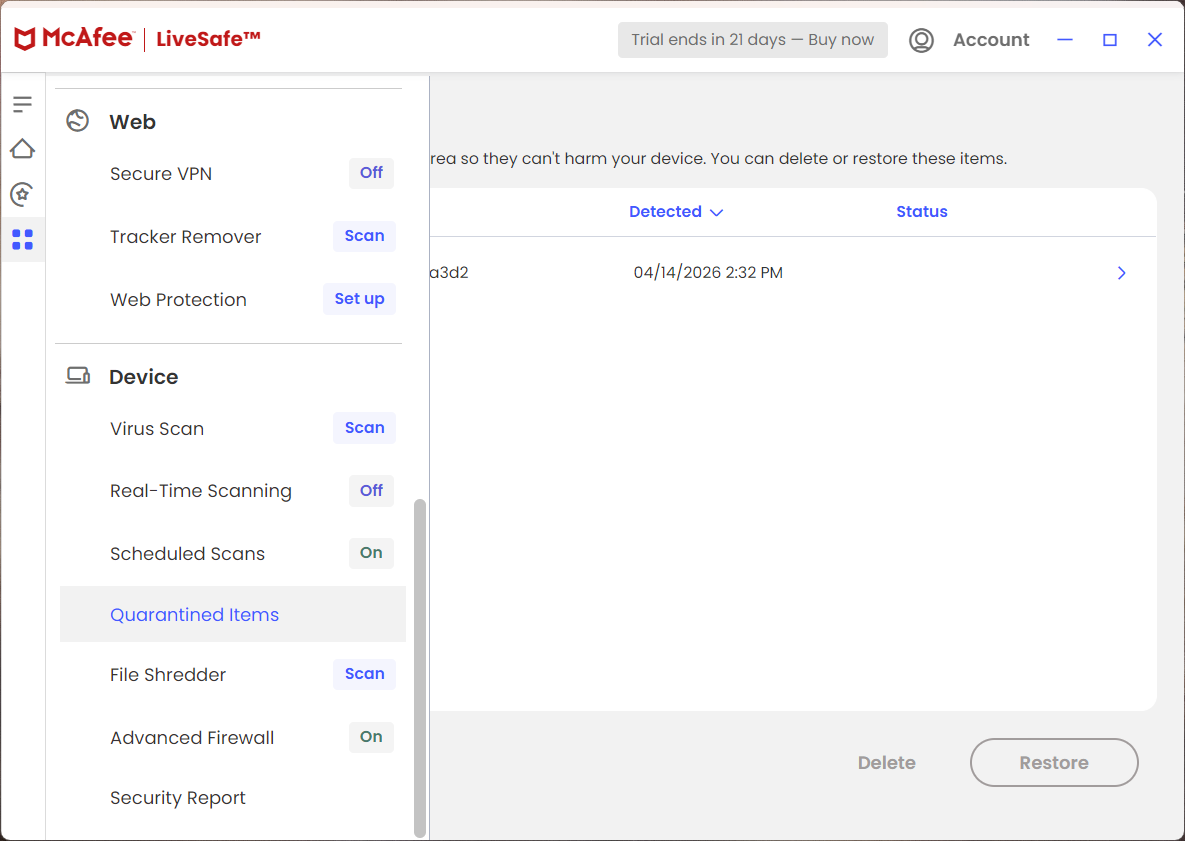
McAfee quarantined items
Locate the SafetySense installer in quarantine.
6

Restore the SafetySense installer

Select the SafetySense installer and choose Restore. If McAfee offers an option to trust or allow the file, use that option as well.
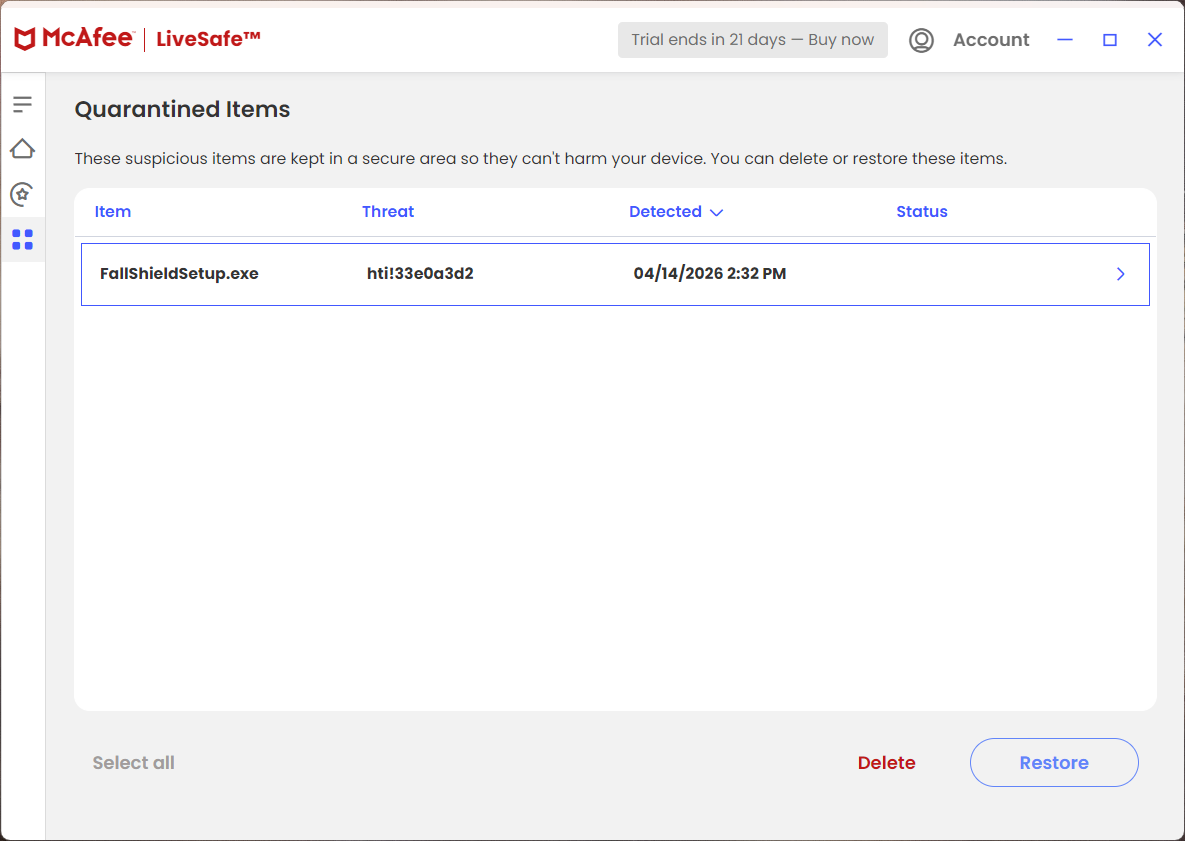
Restore the SafetySense installer in McAfee
Restore the quarantined installer.
7

Run the installer again

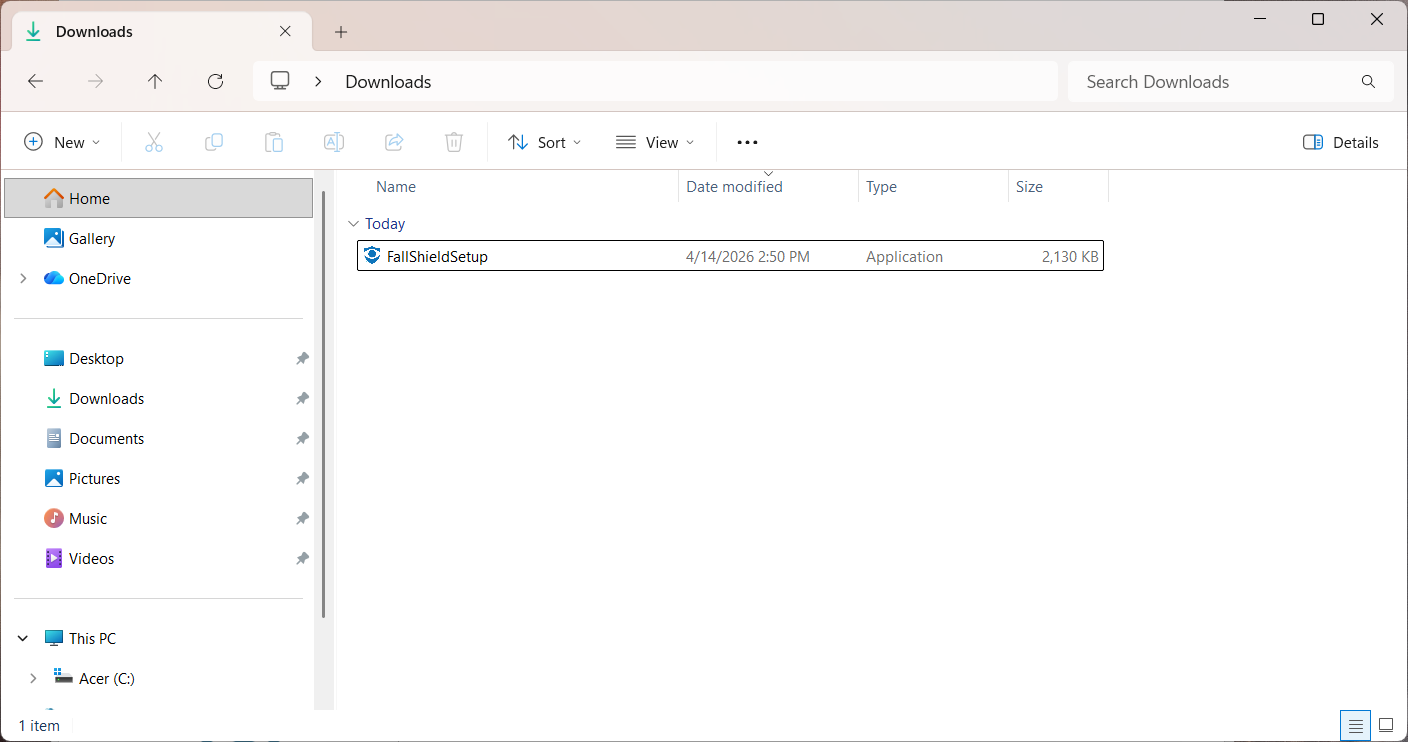
Open your Downloads folder and run the restored SafetySense installer again. Approve the Windows prompt if one appears, then continue with the normal SafetySense Setup Guide.

Run SafetySense installer from Downloads
Run the restored installer from Downloads.
After SafetySense starts installing, return to McAfee and confirm that Real-Time Scanning is turned back on.