Installer guide
FallShield Windows Installer Instructions
Normal default installation: start with the streamlined Installation Guide. This page is the detailed screenshot reference for the Windows installer and Control Center setup screens.
The FallShield installer now has a simplified Windows setup flow.
The installer installs or updates the required FallShield components, then starts
FallShield Control Center so you can finish camera setup, account connection, and camera placement adjustment.
In most cases, choose Default setup and click Next.
Step-by-step guide
1. Download and Start the Installer
Download the FallShield Windows installer from the SafetySense website if FallShield is not installed yet.
After the download finishes, open the installer file. If Windows or your browser asks for confirmation, choose Keep, Open, or Run anyway if needed.
To run setup again, open Settings → Apps → Installed apps, find FallShield, and choose Modify. You can also open the SafetySense folder from the Start Menu and run FallShield Setup. Updates and modify operations use the simplified flow and do not normally show the license page again.
2. Choose Default Setup
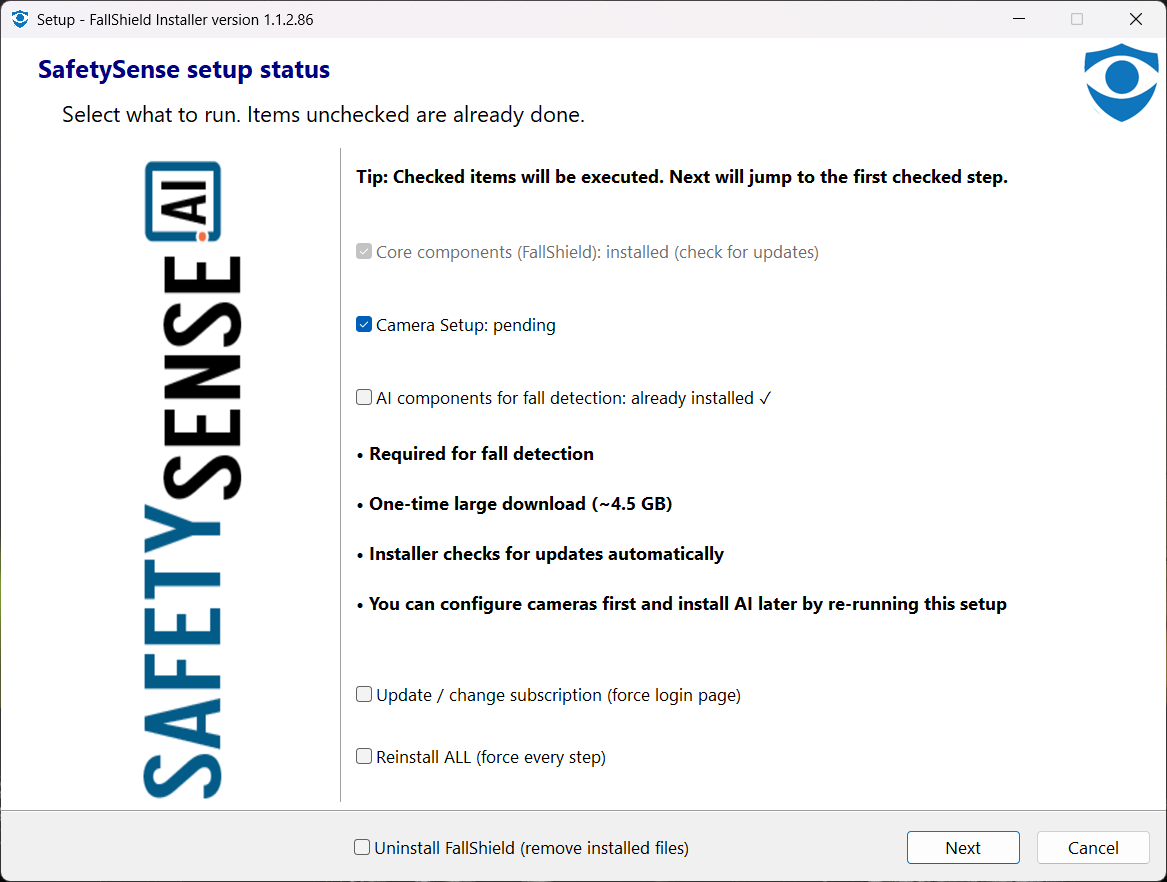
Choose Default setup for a normal home installation. This is the recommended path for most users.
The installer will automatically install or update the required components. Camera setup and account connection will be completed later in FallShield Control Center.
Click Next to continue.
3. Accept License Agreement
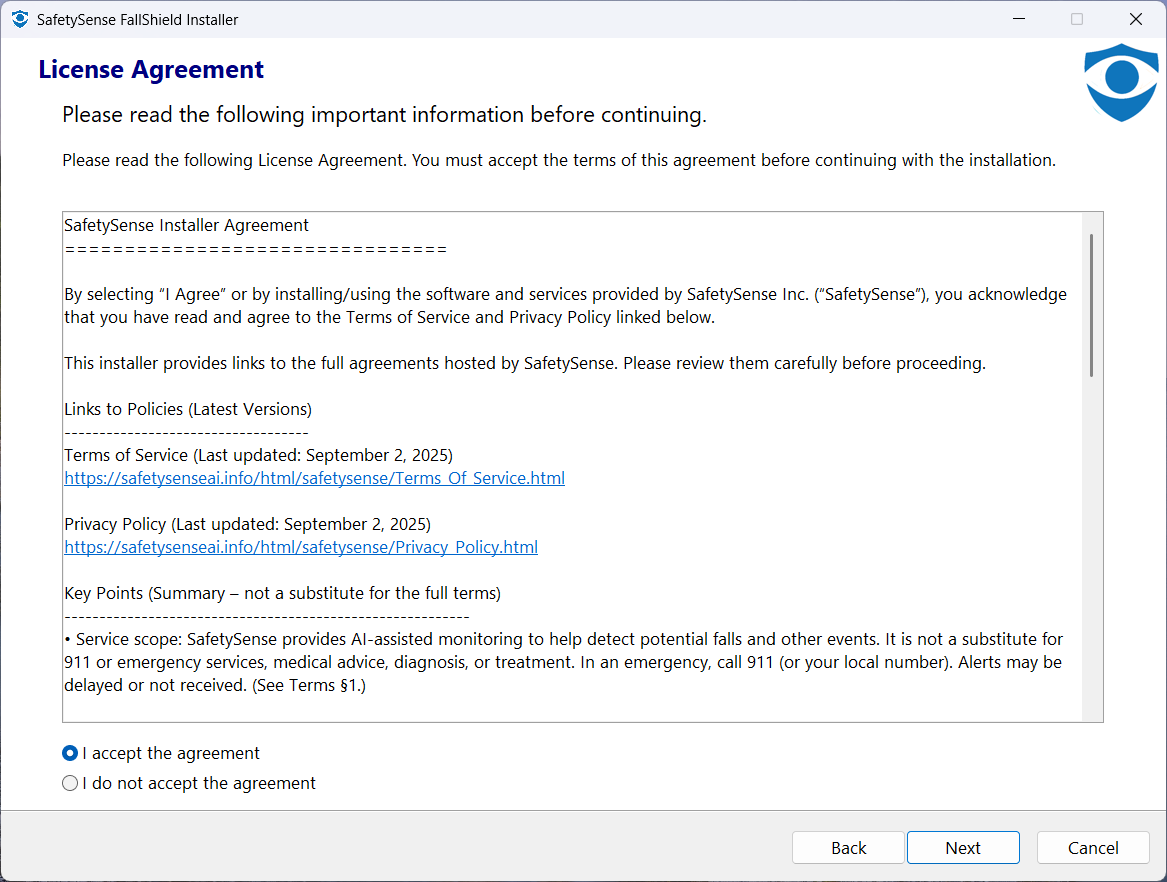
On the first installation, read the license agreement, select I accept the agreement, and click Next.
For later updates or modify operations, the installer normally remembers that you already accepted the license and skips this page.
4. Download and Install Components
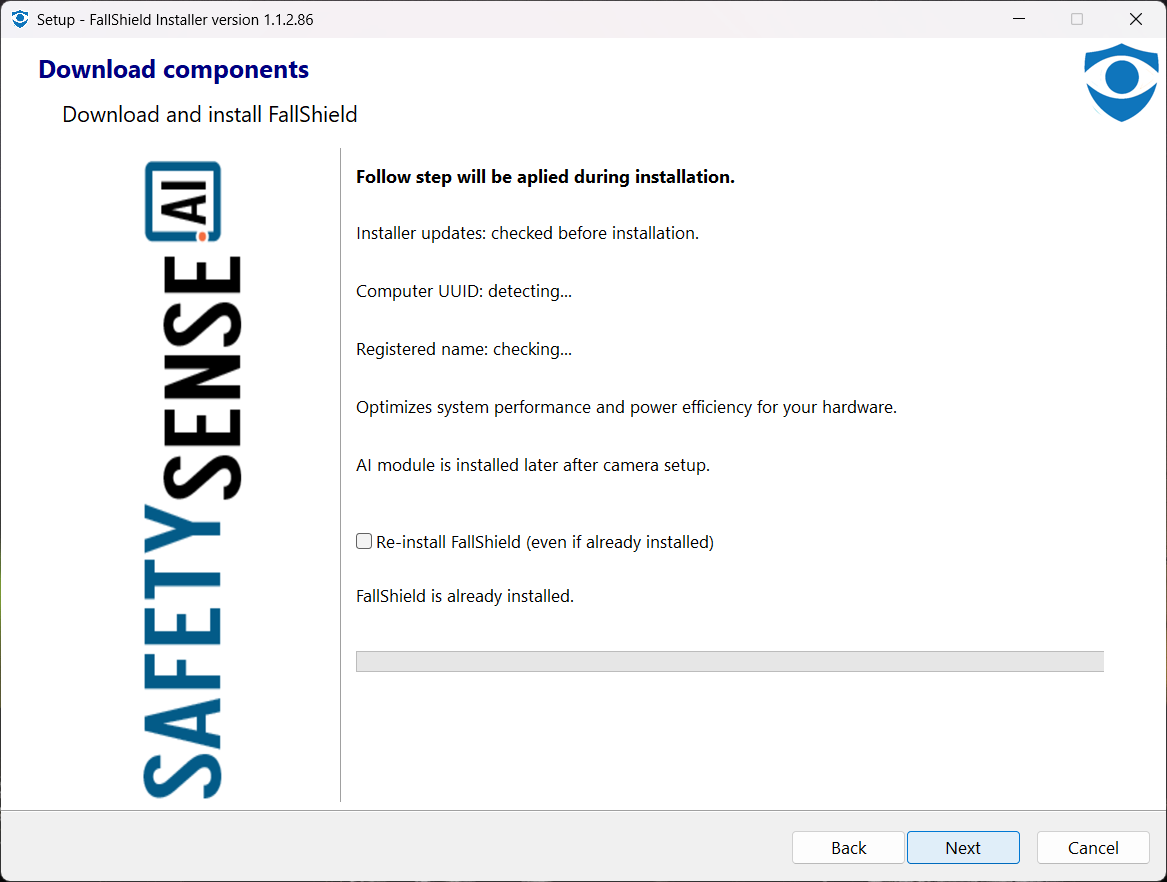
The installer checks required FallShield components and downloads only what is missing or outdated.
The default installation does not show the old camera setup pages or a separate AI package description page. Component installation and updates are handled automatically.
Keep the default choices and click Next. The progress page may take time while packages are downloaded and installed.
5. Finish Installation and Save System Location
When installation is complete, enter or update the system location and click Save location.
This location is used in alert messages, so choose a name that helps identify where the system is installed, such as Mom apartment, Living room hub, or Brooklyn home.
Leave Run FallShield now checked and click Finish. FallShield Control Center will open so you can complete setup.
6. Complete Camera Setup in FallShield Control Center
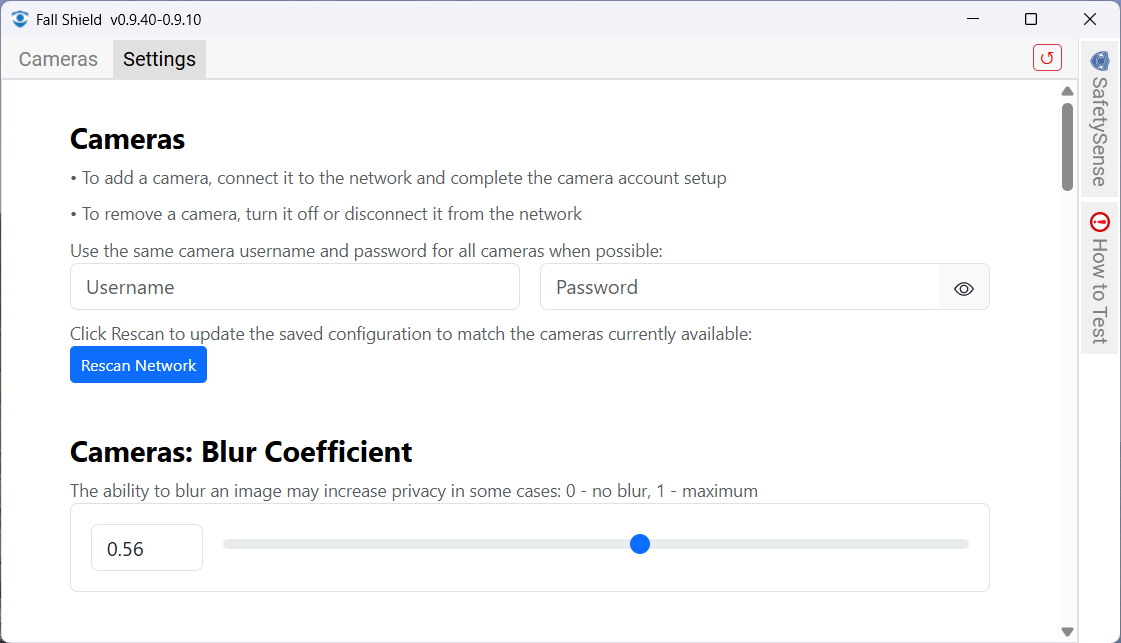
On the first run, Control Center opens the setup page. Use this page to scan for cameras and create the camera configuration.
Enter the camera user name and password. For TP-Link Tapo cameras, this is the camera or device account created in the Tapo app, not necessarily your TP-Link cloud login.
After cameras are found, you can rename cameras and set privacy blur. Blur is used for camera view and for alert pictures sent from the system.
For detailed camera preparation instructions, see Configure cameras or open the short helper page at SafetySense Installation.
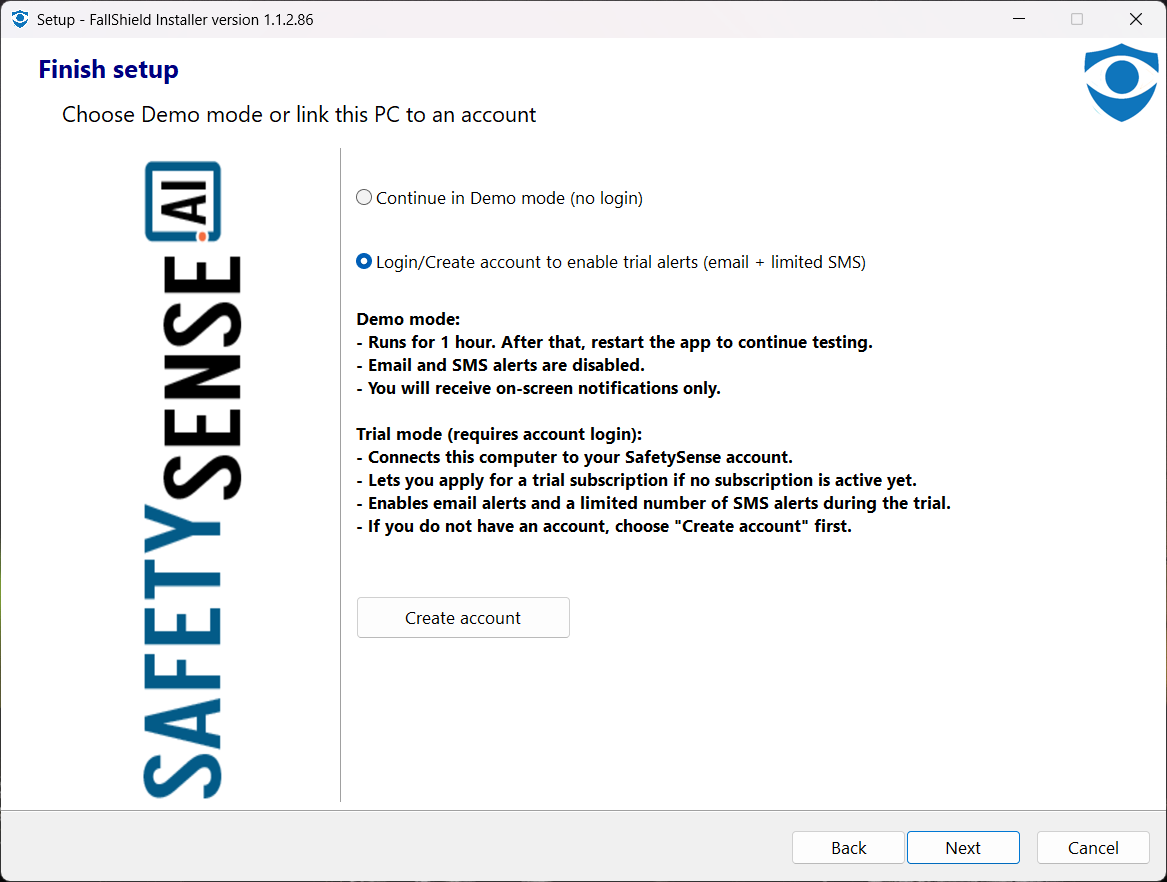
7. Connect Your SafetySense Account
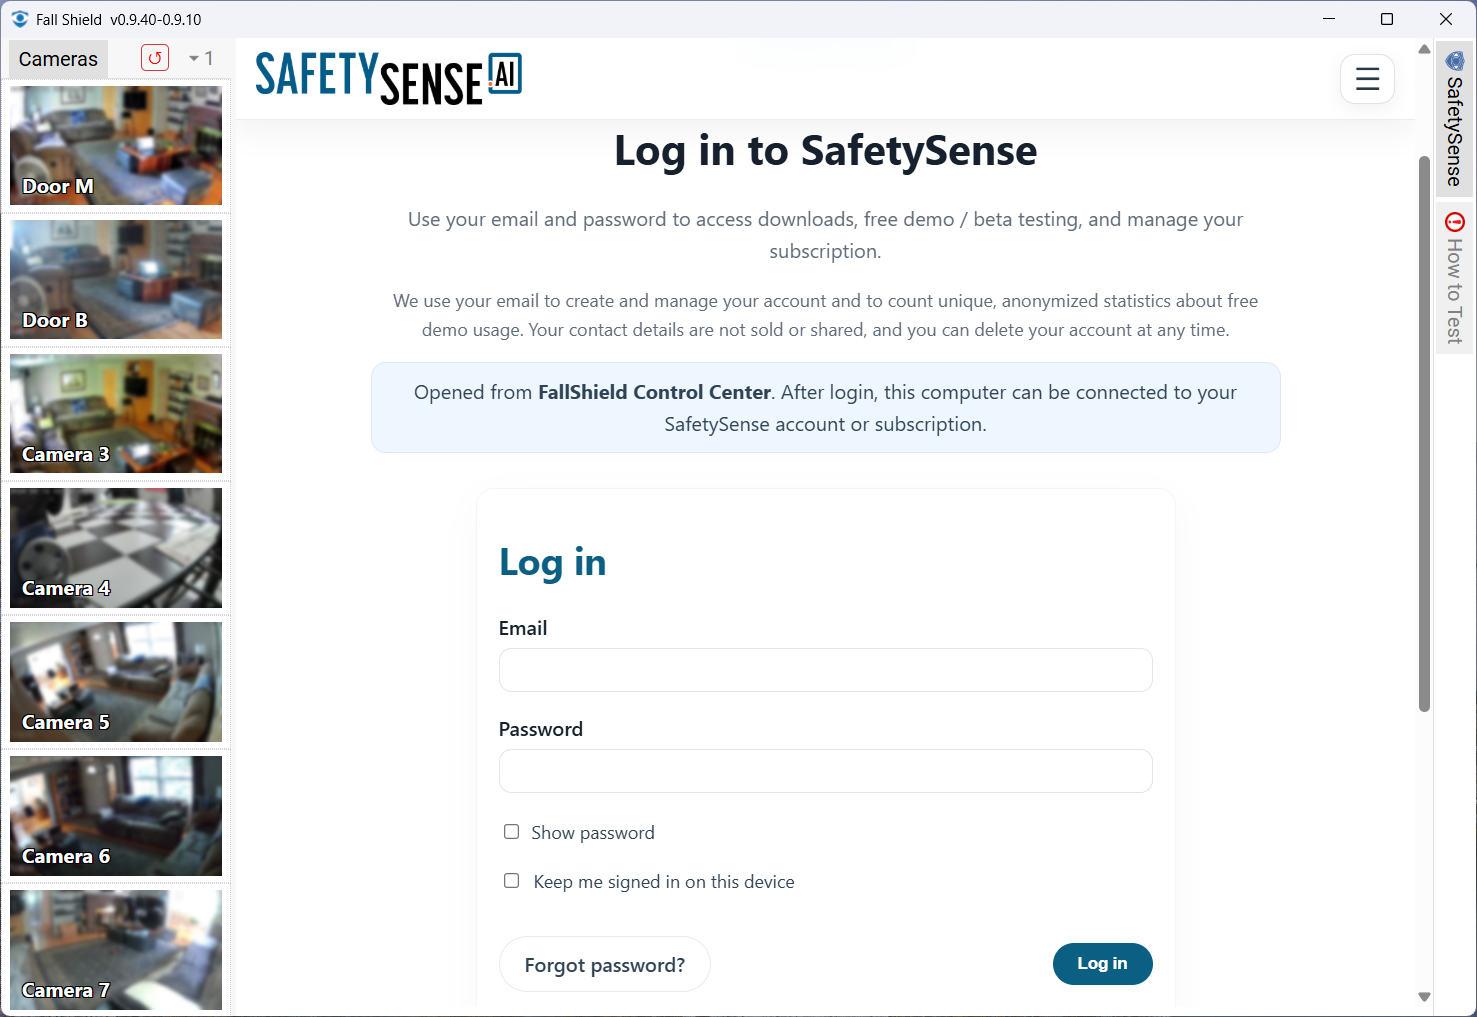
Open the SafetySense tab in Control Center to log in or create an account.
Account connection is now handled through the SafetySense web page inside Control Center instead of the normal Windows installer flow.
After login, connect this installed FallShield system to your trial or subscription so SafetySense can identify the device and route alerts correctly.
8. Adjust Camera Placement
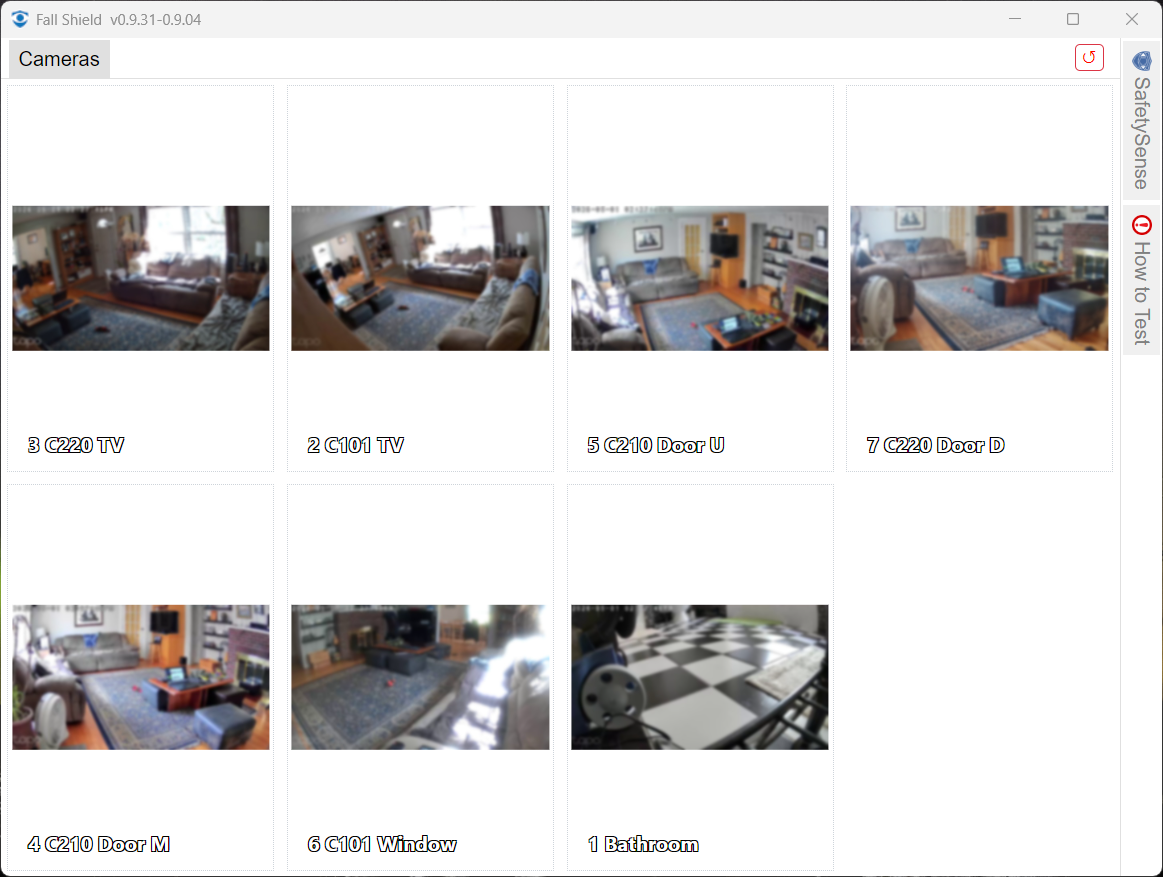
Use the camera view page to confirm that each camera sees the correct area and to adjust camera placement.
This view is mainly for setup and adjustment. You do not need to keep it open for real-time monitoring because FallShield monitoring continues in the background.
For placement recommendations, see the camera placement guide.
Troubleshooting Notes
New installer files may require confirmation. If antivirus software quarantines the installer, restore it from quarantine or temporarily disable real-time scanning during installation. See the McAfee guide if needed.
This is normal after the first accepted installation. FallShield remembers license acceptance for the current Windows user and does not require acceptance again for every update.
This is expected. Camera setup was moved to FallShield Control Center. Open Control Center after installation and use the setup page to scan cameras, enter credentials, rename cameras, and set privacy blur.
Check that the camera is powered on, connected to the same network, and using the correct camera user name and password. Then run camera scan again from Control Center.
Closing Control Center does not stop FallShield background monitoring. Reopen Control Center later when you need to view cameras, adjust setup, or change account connection.
Windows 11 may cache Start Menu entries. The installer creates the SafetySense shortcuts, but the visible Start Menu may refresh later or after restart.